Saving seeds is not essential but is
certainly critical in order to reduce operation costs and increase autonomy.
It’s also a guaranteed source of organic seeds! Like harvesting, it may be obvious
how to collect the seeds of some crops, while other crops will leave one
clueless. Here are some info, methods and tips to harvest seeds from the most
commonly grown crops in our gardens.
Rules of thumb:
1. Most root crops are biennial and
need to be stored indoors over the winter, or under a thick layer of mulch and
other protection if kept in the garden. It’s nearly impossible to keep biennial
and perennial plants alive throughout the winter in containers, as the roots
usually freeze completely and die.
2. Most brassicas seeds are
collected the same way.
3. Do not harvest seeds from
diseased plants, seed heads or fruits.
4. The blender method for fruits goes as follow:
Put the fruits (halved) with water in a blender (about 25% fruit an 75% water). Blend well at low speed, until the seeds are separated from the pulp. Let sit.
Viable seeds will sink to the bottom, while debris and bad seeds will float. Stir gently the floating pulp to allow good seeds that got trapped to sink to the bottom.
Fill gently with water to the top and flush out some water with the pulp that follows.
When good seeds are starting to move with the water, re-fill and re-flush.
Repeat until all the pulp has been removed and only good seeds remain. One can also use a net to catch some of the pulp at the beginning, in order to speed up the process (and use less water).
Pour the water+seeds into a fine strainer. Set on a towel to remove excess water, and lay out on a hard non-porous surface to dry, in a single layer. Use your fingers to separate clumps of seeds if any. Small seeds generally dry quickly.
Types of plants :
-Annuals (A) produce seeds the same
year as they come to maturity. They usually die after producing seeds. Some
plants which are not annual are treated as such under a cold climate like ours.
-Biennials (B) come to maturity on
their first year and produce seeds on their second year of life. They must be
protected during winter either by covering them or bringing them inside and
planting them back outside in spring.
-Perennials (P) produce seeds every
year, but never die after producing them. Some perennials rarely or never
produce seeds when grown in a garden; they most often need to be propagated by
root cuttings.
-Self-pollinated (s-p): Some plants do
not need the help of pollinators in order to pollinate their flowers and
produce viable fruits and seeds. Each flower contains both a "male"
(anthers) and "female" (ovaries) parts, so the pollen doesn’t need to
be transferred between flowers. This limits the risks of cross-pollination
(when the pollen of one variety pollinates the flower of another variety,
mixing genes from both varieties in the seeds) and these plants will "always"
produce seeds that are true to their variety. Pollinators do collect
pollen in their flowers, though, so it’s possible that seeds may not be true,
although it’s really rare.
-Cross-pollinated (c-p): Flowers only
contain either the anthers or ovary, so pollen needs to be carried from
anthers-carrying flowers to ovaries, in order for them to develop into fruits.
Ovaries of one crop or variety that are pollinated by pollen from another
crop/variety will yield a normal fruit, although the crop resulting from the
seeds of this fruit (or the fruits of said crop) will not be true to either crop/variety
(i.e. you’ll get a hybrid, and it’s probably not gonna be good).
Beets and swiss chards, for example,
can cross-pollinate, but the result will be neither a root like beets, nor a
leafy green like chards. Broccoli and cauliflower can also cross-pollinate, and
will give a mixed crop that will be neither broccoli nor cauliflower (nor a
happy mix of both). Gardeners have to erect barriers of any kind to prevent
cross-pollination between compatible crops or plant them far away from each
other (at least 50-100 feet between different varieties).
Tips & Resources
See this website for useful info on recommended
distances and dominant and recessive genes.
Seeds are stored in an air-tight
container (except for peas and beans, which like air) labeled with name of
crop, variety, year, and any other relevant information (e.g. resistance).
Proper seed storage conditions are dry and cool. Most seeds can be frozen
without harm if properly dried.
Onion, leek, corn and parsnip seeds
have a much shorter shelf-life than other vegetable seeds. Seeds can usually be
kept 4-5 years in proper conditions.
Do not harvest seeds from diseased plants,
fruits, seedpods, seedheads, etc. Do not harvest seeds from unripe fruit or
immature seedpods or seedheads either: the seeds are not likely to be ready and
may have difficulty germinating (if they germinate at all).
Turn and spread seeds several times
while they dry. The bigger the seed, the longer for it to dry completely. The
drying process can be hastened by gently heating and/or aerating the seeds, as
long as the temperature does not exceed 38°C.
--> Brassicas
-----Broccoli (c-p, A)
 |
| conner-learneveryday.blogspot.ca |
Will cross with cabbage, brussel
sprouts, cauliflower, collards, kale and kohlrabi.
Like most brassicas, the broccoli will
send out a stalk bearing small yellow flowers. These will turn into small pods.
Pick the pods when they are dry and brittle.
Thresh by hand (or otherwise if you
want), and separate the chaff using appropriate screens, or a fan or hair
dryer.
-----Brassicas (c-p, B)
 |
| minnesotawildflowers.info |
Include cabbage, brussel sprouts,
cauliflower, collards, kale and kohlrabi.
Must be overwintered outdoors or
indoors like beets, carrots, etc. (i.e. outdoors = thick mulch, indoors =
near-freezing temperatures + high humidity)
Plant back in spring 2-3 feet apart.
For cabbages, cross-cut about 1 inch
deep into the center of each head to favor seed stalk emergence. Stake, as they
grow up to 6 feet tall the second year.
Cauliflower does not overwinter well
indoors or outdoors.
All brassicas produce pods (like
broccoli) that will dry. Harvest the pods before they are completely dry, as
they tend to eject seeds when fully dried. Process like broccoli seeds.
-->Greens
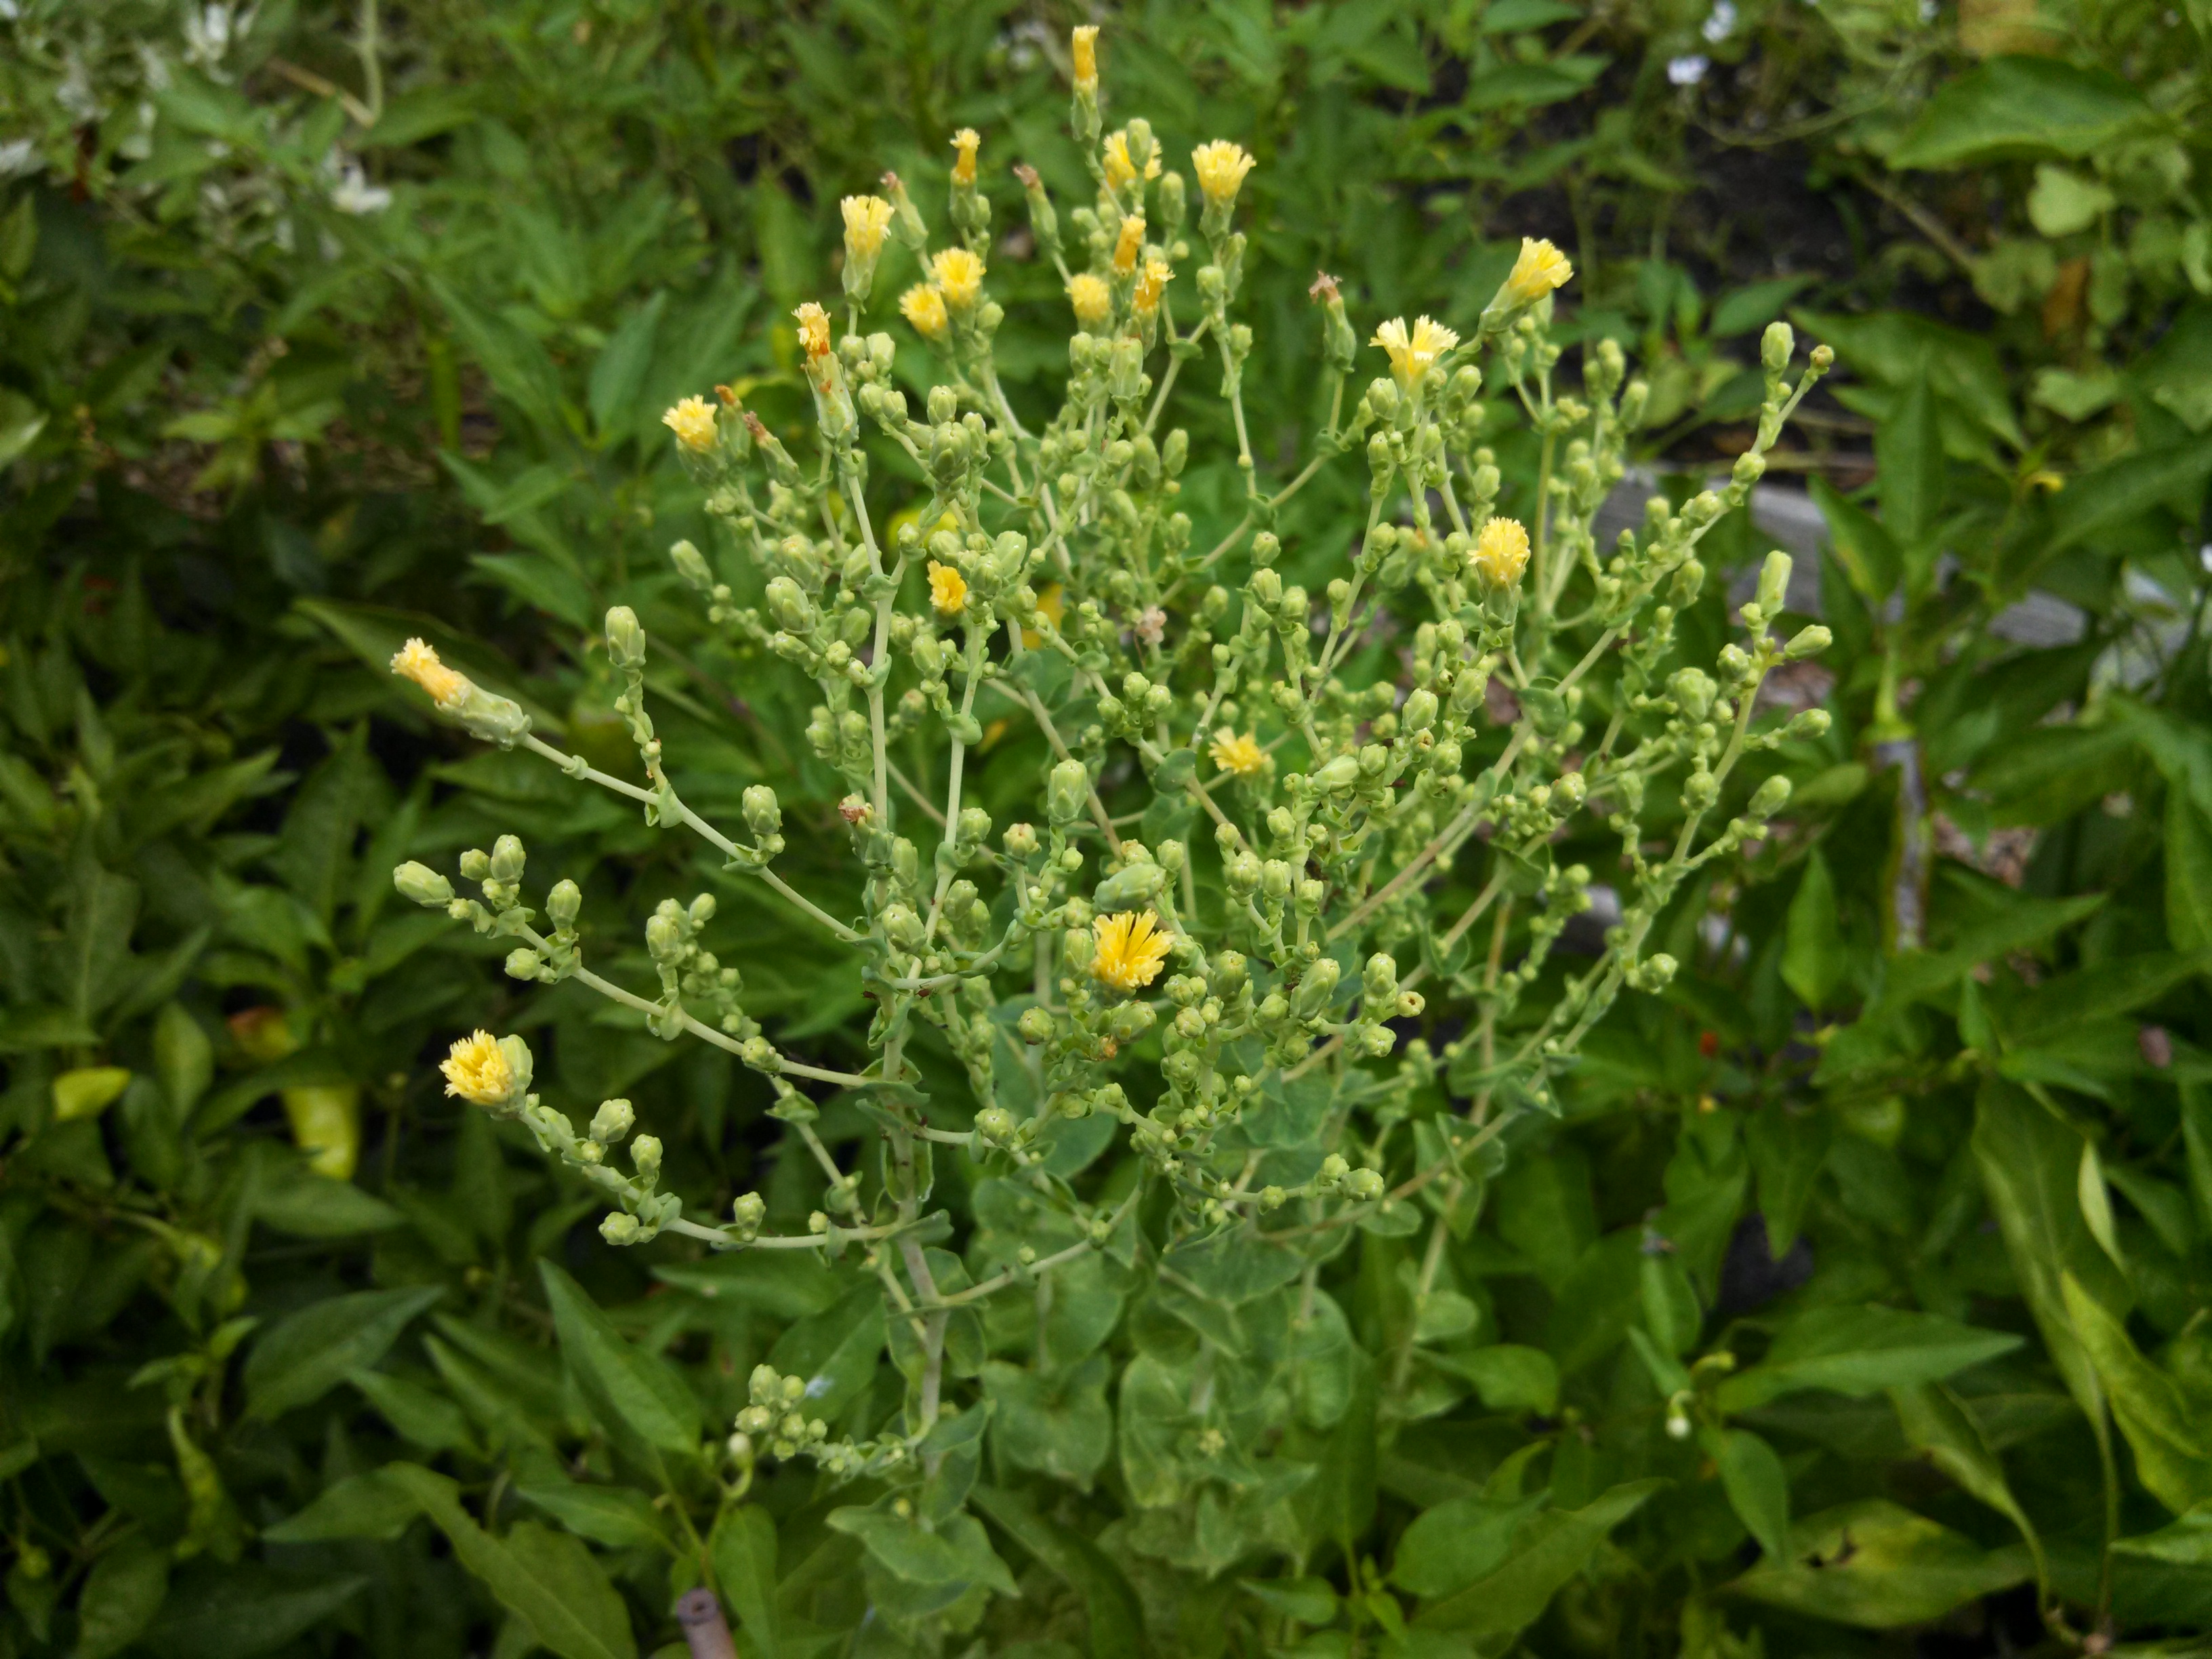
-----Lettuce (s-p, A)
 |
| sanctuarygardener.wordpress.com |
Lettuce seeds are usually harvested in
September or October. Some cultivars will not produce seeds before the plants
are frozen or dead (i.e. they don’t produce seeds).
When flowering, lettuce sends up a
stalk up to a meter tall, atop which will be flowers. These flowers will
produce small airborne seeds similar to those of dandelion (with a
parachute-like structure of hairs). Seeds can be harvested when the parachute
is formed.
To harvest seeds, one can either pick
bunches of seeds at a time from the stalk, or wait until about a third of the
flowers have turned into viable seed and cut the stalk. The stalk can then be
turned upside down over a container and shaken, or the seedheads can be rubbed
between thumb and forefinger over a container.
The seeds must then be left to dry for
a few days on trays in a warm and airy place. The seeds are viable for 4 years
in proper storage conditions.
-----Spinach (c-p, A)
 |
| sweetdomesticity.com |
Spinach sends out a stalk bearing
flowers. Seeds can be stripped directly from the stalk. Use the usual methods
to remove any chaff.
-----Swiss chard (c-p, B)
 |
| beyondthekitchengarden.wordpress.com |
Will cross with beets.
Hardy enough to be left outdoors
throughout winter. Cut the stalk an inch over the soil surface and cover with
thick mulch in fall, before heavy frost.
The next spring, trim to about 2 feet
apart. The plants will grow stalks similar to beets, on which seeds similar to
beets can be stripped from the stalk quite similarly like beets.
-->Roots
-----Beets (c-p, B)
 |
| wildgourdfarm.wordpress.com |
Will cross with swiss chard.
Beets can be left to overwinter by
covering with a thick layer of mulch (not sure if recommended for our climate).
They can also be brought indoors. In that case, pull them before heavy frost in
fall and cut the tops 1 inch above the crown. Handle carefully as damaged beets
will rot. Store at 4-10°C in dampened sand or fresh sawdust until spring.
In spring, replant beets when it’s
safe to plant them. Thin or plant beets at 2 feet apart, crowns even with the
soil surface.
In summer, the plants will completely
dry. Seeds can be stripped from the stalks.
-----Carrots (c-p, B)
 |
| wikimedia.org |
Will cross with Queen Anne’s Lace (wild carrot).
In fall, before heavy frost, bring
inside like you would with beets. Cut the tops 1 inch above the crown. Store at
4-10°C in dampened sand or fresh sawdust until spring. Some people only save
and replant the crown, cutting out the rest of the root.
In spring, plant one foot apart.
During the summer, carrots will grow stalks up to 6 feet tall. They produce
umbels (flower heads). Seeds are ready when brown, around September. Umbels can
be picked as they mature, or one can cut whole stalks and let to cure (dry) for
a few weeks (usually upside down, the umbels wrapped loosely in paper bags).
Rub off seeds when completely dry. Use
a screen to remove chaff.
-----Garlic & potatoes
Clonally reproduced by replanting
properly saved tubers or bulbs.
Garlic must be planted in fall and
covered with thick mulch.
Potatoes have their own saga on our blog.
-----Leek (c-p, B) & scallion
 |
| wikimedia.org |
May cross with onions.
Overwinter easily. Cover with a thick
mulch in fall, before heavy frost. Harvest any plant that does not look
healthy.
The next year, the leek will send a
stalk with a flower. As soon as the black seeds are visible in the flowers, cut
the flower head and hang upside down, wrapped in a paper bag.
-----Onion (c-p, B)
 |
| wikimedia.org |
Use harvested, dried and cured onions.
Replant in early spring.
Flowering and seed harvesting are the
same as for leek.
-----Parsnip (c-p, B)
 |
| veggiegardeningtips.com |
Bring indoors like carrots.
Harvest seeds when dry and light
brown. Seeds fall off the plant readily, so do not delay harvest.
-----Radish (c-p, A/B)
 |
| dragonplants.blogspot.ca |
Treat as annual if planted in spring,
will produce seeds in fall. Treat as biennial if planted in fall, same
procedure as beets (harvest in fall, cut the tops, keep indoors in humid and
cold conditions, replant in early spring every 20-25 cm, 5 cm
deep).
Seeds are ready when seed pods are
brown. If the pods are not ready at the end of the season, pull out the entire
plant and hang to dry in a cool and dry location.
Open pods by hand, or smash with a
mallet.
-----Shallots (c-p, B)
 Generally propagated vegetatively by
replanting shallots, but can be left to go to seed.
Generally propagated vegetatively by
replanting shallots, but can be left to go to seed.
After being harvested, dried and
cured, shallot bulbs can be replanted. Shallots grow better in cold conditions,
so plant only in early spring or early fall. Better yields are obtained in
fall, although shallots can be lost to frost.
-----Turnip (c-p, B)
 |
| livingcropmuseum.info |
Same procedure as beets (mulch in fall
or take indoors for winter, cut tops to 2 inches). Plant at least 2 feet apart in early
spring.
Will produce pods (like other
brassicas). Harvest individual pods as they turn brown; green pods do not give
viable seeds.
To thresh, place dry pods in a cloth
bag. Walk over them or smash with a mallet. Separate from chaff.
-->Nightshades
-----Eggplant (s-p, A)
 |
| graphicgardener.com |
With a fruit that has fully ripened on
the plant, one can cut the seedy part of the fruit into cubes and use the
blender method (as for ground cherries and tomatillos).
-----Ground cherries &
tomatillos (s-p, A)
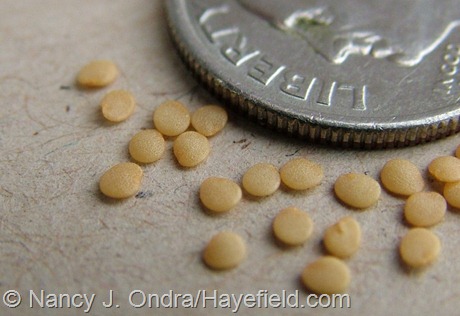 |
| hayefield.wordpress.com |
Harvest fruits when ripe. Let ripen
about a week after picking.
Use the blender method.
-----Peppers (s-p, P)
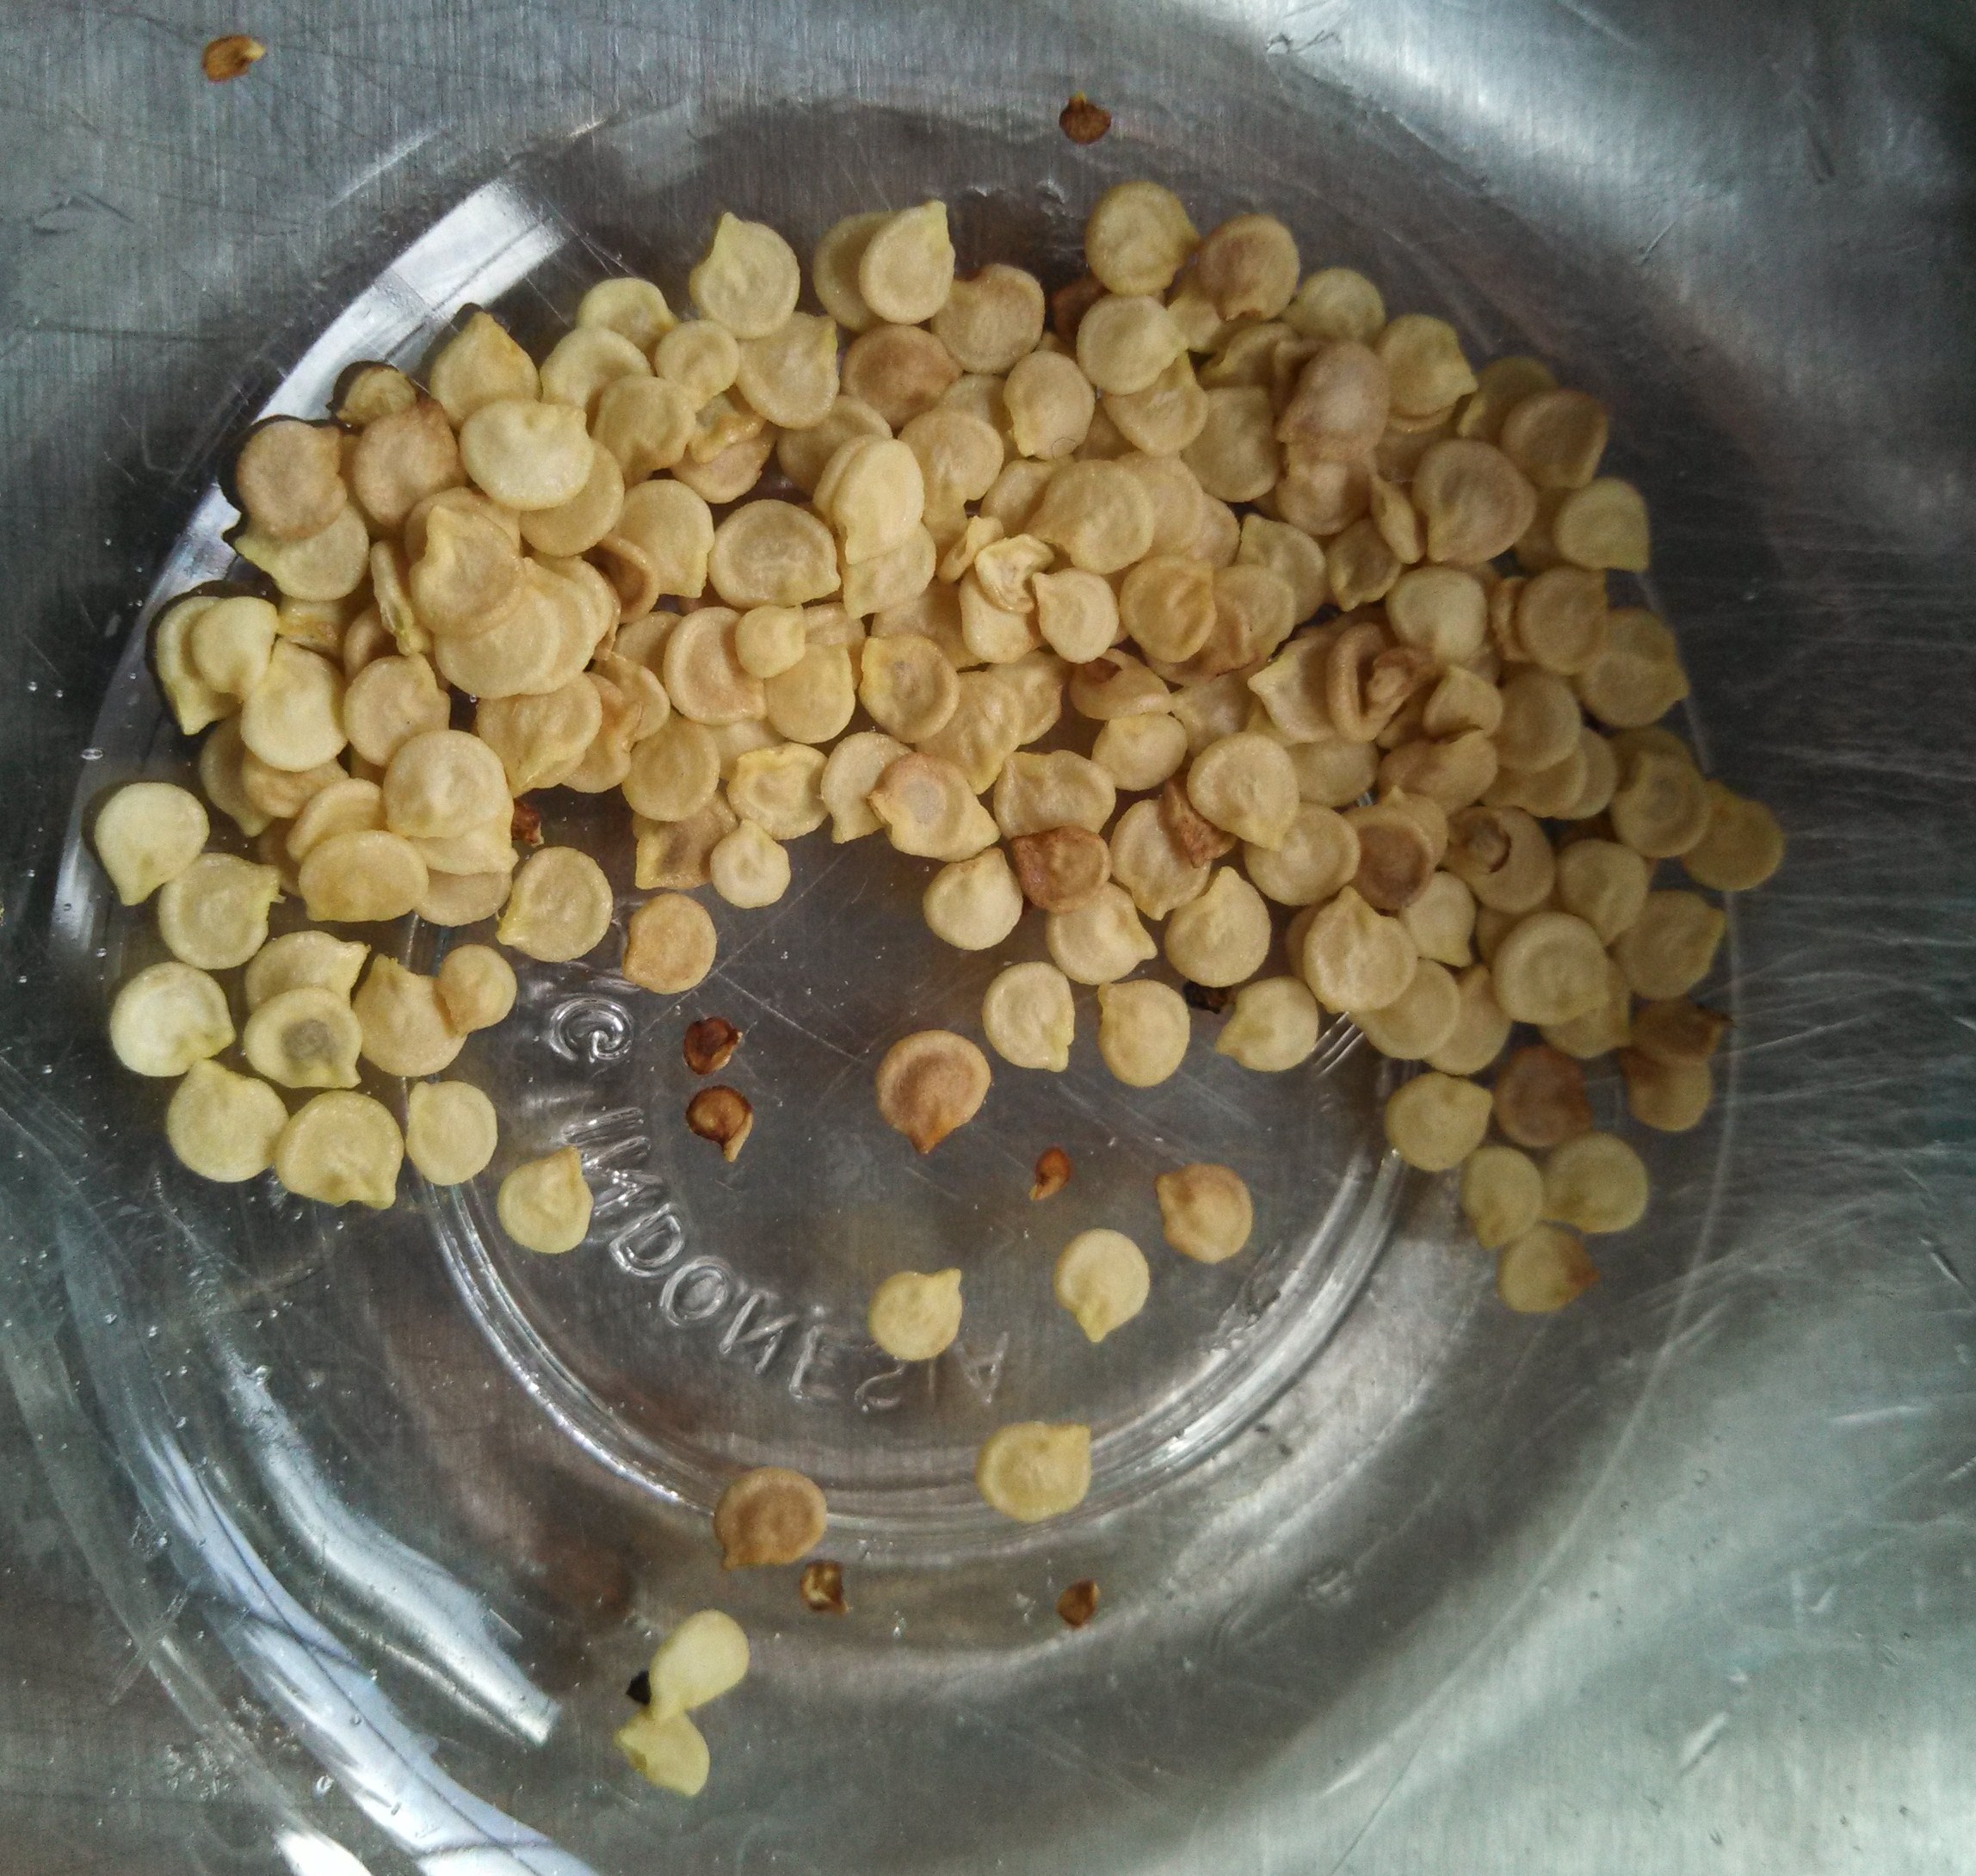 |
| sanctuarygardener.wordpress.com |
Perennial treated as annual.
Pick a ripe fruit and rub the seed
mass to collect the seeds. Dry on a hard non–porous surface.
Easy peasy.
-----Tomatoes (s-p, A)
 |
| graphicgardener.com |
The blender method can be used, but tomato seeds tend
to get diseases. To prevent this, a fermentation process is preferable.
1) Pick really ripe tomatoes and cut in
half at their equator. Extract the gel-like juice from the cavities. If done
properly, the tomato can still be eaten afterward. Collect the juice and seeds
in a clean container (clean is important, as we’re kinda trying to prevent
diseases here).
2) Then, if processing a few tomatoes
only, add a little water to the mix. If processing large amounts of tomatoes,
the water from the tomatoes should be enough. Put a lid on the container and
label with date and what’s in it.
3) Store the container in a warm location
(15-25°C) for about three days, stirring once every day. After a couple of
days, a layer of fungus will form on the liquid. This fungus eats the gel coat
around the seeds and produce antibiotics that will get rid of seed-borne
diseases.
4) After three days, add warm water to
the container, let sit until everything settles (good seeds will be at the
bottom, all the crap we don’t want will float at the top), and then start
pouring gently to evacuate the floating stuff. Re-fill and re-pour until the
water is quite clean.
5) Pour the water+seeds into a fine
strainer. Set on a towel to remove excess water, and lay out on a hard
non-porous surface to dry, in a single layer. Use your fingers to separate
clumps of seeds if any. The seeds are small so they generally dry quickly.
--> Misc. fruits
-----Beans & peas (s-p, A)
 |
| Dry bean pods: awaytogarden.com |
Pick the pods when dry, when a
thumbnail can’t make a dent in the seeds.
Let the pods dry for another few days,
more if picked in wet or humid weather. If it applies, wait until the seeds
rattle in the pod when shaken.
Then, remove the seeds from their
pods. This can be done by hand or, for large quantities, the pods can be
threshed in a threshing box or on any kind of tarp by stepping on them (in that
case, do it
barefoot and be sure that the seeds are very dry in order not to
damage them).
 |
| Dry pea pods: yearroundharvest.com |
Separate the beans from the chaff
using appropriate screens, wind (simply pour the seeds+chaff into another
container from a certain height during a windy-yet-not-too-much day; the chaff
will be carried away by the wind while the beans will fall straight into the
receiving container), water (chaff and bad seeds will float; viable seeds will
need to be dried again), or air compressor.
Not necessary, but it’s good to let
seeds dry again after threshing, in a warm and airy location for a few more
days. Inspect seeds to remove damaged or otherwise suspect ones. The seeds will be
completely dry when they collapse into powder upon smashing with a hammer.
Properly dried beans and peas can be frozen
without harm to get rid of any insects that could be hiding in the lot.
It can be interesting to separate
seeds from particular plants or pods and label them, as they can be used for
artificial selection. For example, rattlesnake beans have green-and-purple
pods, but they sometimes produce pods that are greener or more purple than the
average. Purple or green rattlesnake beans could probably be obtained after a
few generations.
-----Cucumber (c-p, A)
 |
| aggie-horticulture.tamu.edu |
Cross with one another but not with
other cucurbitaceae (squash, gourds).
Let the fruit ripen past edible shape.
The fruit will become golden, yellow or white. The vines can die from frost at
that point without harming the seeds.
Cut the cucumber in half lengthwise
and scoop out the pulp and seeds in a non-metallic container. Leave in a warm
location to ferment for 3-4 days, stirring a few times every day, until the
pulp turns liquid. Good seeds will sink to the bottom, bad seeds will float.
Dry in a warm and airy location,
stirring once in a while to encourage uniform drying. Seeds will be dry when
they are not slippery to the touch and can be broken neatly (not bent).
-----Squash & pumpkins (c-p, A)
 |
| anuts.com |
Four different species: Cucurbita
pepo (summer squashes, acorn squashes, orange pumpkin types, Delicata, Lady
Godiva, and Spaghetti), Cucurbita maxima (buttercup, hubbard,
Delicious, Banana, and Hokkaido), Cucurbita moschata (Butternut
and Cheese), and Cucurbita mixta (Cushaw squashes).
Won’t cross with cucumbers and melons,
nor between species. Will cross within species (e.g. acorn and spaghetti can
cross, and the squash grown from their seed will be neither one nor the other).
If growing many species at once, ovary
flowers should be wrapped in paper bags and fertilized by hands to prevent
cross-pollination.
Summer squash must be left on the vine
8 weeks past its normal harvesting date, until its skin is as hard as a winter
squash.
Winter squash and pumpkin will give
more vigorous seeds if left on the vine as long as possible, about a month or
two past their normal harvesting date. They can tolerate some frost.
Cut the squash in half lengthwise,
scoop out the seeds and separate them from the stringy-pulpy-whatever material
in which they’re entangled (do it in a bowl filled with water if necessary).
Wash the seeds and lay them out on a tray in a warm and airy location, stirring
them at least once a day to encourage drying. Keep plump seeds only; flat seeds
are not viable.
-->Herbs
-----Chives (P)
 |
| frutasdelmundo.inriodulce.com |
Harvest seed heads when seeds are
black. Let dry for a few more weeks.
Rub off the seeds with hands.
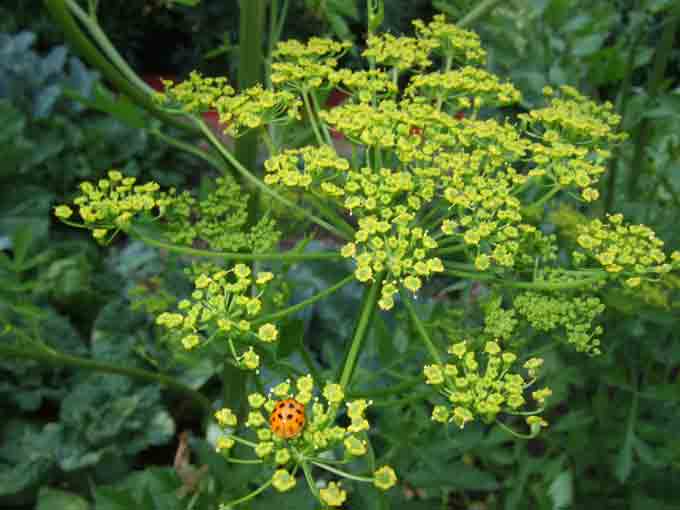
-----Dill & parsley (B)
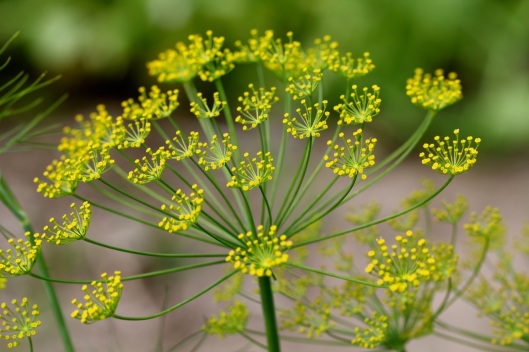 |
| cabinorganic.com |
Grown as annuals.
In the carrot family. Produce umbels
like carrots. Harvest and process like carrot seeds.
-----Other herbs
 |
| Basil flowers: malaysiaria.com.my |
Most herbs produce long stalks,
“towers” of small flowers. Harvest seeds when the flowers have turned brown and
you can see the black seeds inside the flowers (if big enough). Thresh the seed
heads by rubbing them between hands.
-->Flowers
Different for each flower. Here are a few common garden flowers.
-----Calendula (c-p, A)
 |
| wikimedia.org |
Let flowers dry and fold onto
themselves, until brown and hard.
Harvest by removing the hard parts from the
flower.
To improve production, harvest flowers
as soon as they open; calendula greatly (!) increases flower production when
harvested regularly.
-----Sunflower (c-p, A)
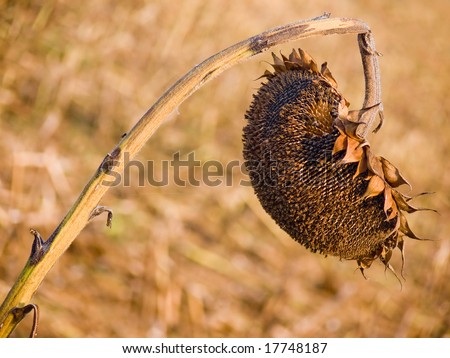 |
| shutterstock.com |
Save seeds like you’d harvest them
(but don’t bake them).
-->Misc.
-----Rhubarb (P)
 |
| sweetdomesticity.com |
Usually propagated from root cuttings.
If done so, it is recommended to divide the crown in early spring or late fall,
when the plant is dormant. Dig out the crown without damaging roots, and use a
sharp knife to cut a part of the crown (the big red roots near the soil
surface). Replace soil over crown and plant cutting as soon as possible.
-----Strawberry blite (A)
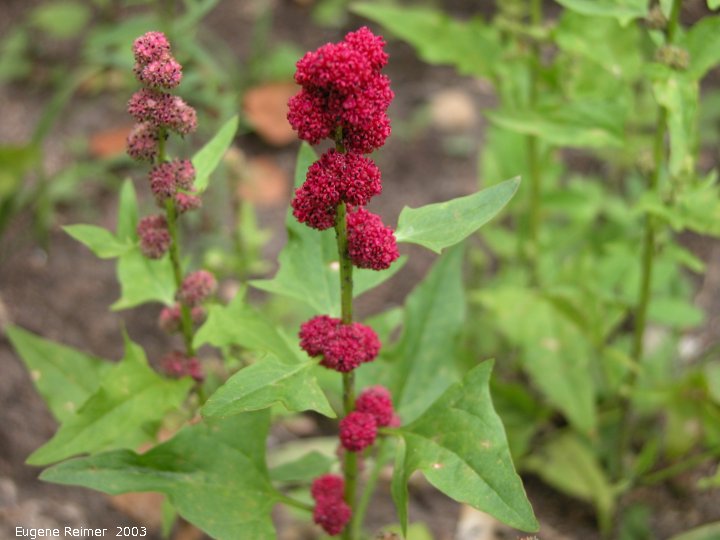 |
| ereimer.net |
Harvest the berries when of a dark
pink color. Dry them directly, or separate seeds by crushing the berries and
mixing with water. Tiny seeds, so a very fine strainer must be used.
Self-seeding, so if you want it at the same spot the following year, you can just let some of the berries fall to the ground.
